This semester, I am again privileged to offer a Video Game Design & Development Studio, through Ball State University's Immersive Learning program. I have eleven students working with me this semester: seven from Computer Science, two from Animation, one from Philosophy and Religious Studies, and one from Digital Storytelling. Our community partner is The Children's Museum of Indianapolis, who I worked with two years ago when I was at the Virginia B. Ball Center for Creative Inquiry.
We spent the first week of the semester going over some basics of game design theory. The team read several sections from Ian Schreiber's Game Design Concepts blog. I don't know if anyone is still actively following the exercises, but even without this community aspect, the blog makes an excellent free textbook on game design. I also assigned a few other readings, including How to Prototype a Game in Under 7 Days and the MDA paper. Each student conducted two critical analyses—the first, a game of their choice, then one that is explicitly educational. Conveniently, Raph Koster posted an excellent essay on critical analysis that same week, and I pointed my students there for some ideas on how—and why—to do the analysis.
During the second week, each student was asked to make a concept document, in Tim Ryan's format, based on any of the given themes from the community partner. The strong majority of these were based on the "Bone Wars"—the feud between rival 19th-century paleontologists Othniel C. Marsh and Edward D. Cope. The team agreed that this represented shared interest, and so then each was asked to create a playable prototype based on this theme.
The story of Marsh and Cope is fascinating, and I highly recommend the American Experience documentary about them. I find the topic rife with possibilities, two of which stand out to me. First, the historic activities of these two men clearly represent a competition for fame: that is, it already had the critical properties of a game. Second, their story is tied to the origins of modern paleontology, which involves significant procedural knowledge—the type of which can be encapsulated in the process of the game.
I wrote a concept document of a variable-phase Bone Wars game and shared that with the team, mostly so that I could model for them how to approach the problem. Every time I deploy Tim Ryan's format with students, a significant portion of thm miss the important point that the description should be in the second-person present tense. This makes for a good lesson when we review the documents, and I can demonstrate the rhetorical difference between this and comparatively dry and "academic" third-person.
The next step was for everyone to develop a playable prototype. My own design evolved into a worker-placement game emphasizing the paleontological process in a competition for fame. About half the students and I put our prototypes forward for consideration, but in the ensuing discussion, we realized that mine was the only one that was actually a playable prototype: the rest ranged from sketches to storyboards, but none were playable. Given the options, the team decided to move forward into production with my prototype rather than spend more time iterating on designs.
There was an awkward moment of professorial decision-making involved in the selection of the prototype. I pointed out to the team that none of their artifacts were actually playable prototypes. A student suggested that we do yet another round of prototyping, because, as the student claimed, now they knew how to do them, and they could work together on it. Both parts of this stung me. The assigned reading clearly explains how the prototyping process works and proclaims the importance of playable prototypes. Actually making a prototype is harder than reading about it, of course, but the matter of what constitutes "playable" is purely theoretical: one who did an honest reading of the material should have been able to identify whether a prototype is playable or not. Also, the team had already been encouraged to work with each other, together in the studio, to develop, test, and tune these prototypes. I made mine in the studio so that I could model my own idiosyncratic techniques, but I was alone the whole time. It seems the students, at that point, had not internalized the idea that we're all in this together. It is possible that the problem here is that recognizing prototypes as playable is actually hard and I have internalized too much, in which case I should develop better interventions for future groups. On the other hand, if the problem is that some students are not taking the reading seriously, maybe I need to encourage more group discussion of the readings. In any case, the clear majority of students wanted to move forward with my prototype and get started with production, and so I did not comment on the matter.
Incidentally, about half the students chose not to propose their own prototypes for consideration by the team. I have very little data about these: I saw some laid out on the table, but I never saw them in action. It makes me wonder if these students did, in fact, create playable prototypes, and through this, realized how hard it actually is to make a good educational game. From some informal conversation, I suspect this to be true for at least a few of the students.
Now, we're two weeks into the first sprint, with plans to have a publicly-testable paper prototype as well as a digital proof-of-concept done by the end of the week. I am enjoying working with the students in these varied production tasks, including creative design work and technical software architecture.
The project blog can be found at http://bonewarsproject.blogspot.com, where you can find student essays and photographs. You can also follow us on Twitter (@bonewarsproject).
Sunday, February 9, 2014

Saturday, January 11, 2014
A Return to Painting
Over twenty years ago, I used to enjoy painting miniatures. My father introduced me and my brother to miniature painting before we played D&D. I fondly remember painting metal figures at the kitchen table and building dioramas out of scrap wood, twigs, lead, clay, and caulk. My father bought us issue #100 of White Dwarf at a game shop, and I am sure I spent hours looking over the figures and dioramas it contained.

When my brother and I started a D&D group, it was natural to bring our miniatures to the table. The desire for affordable miniatures led us to seek out fantasy board games such as the classic Hero Quest and lesser-known but fondly-remembered Dragon Strike. (Dragon Strike came with a VHS cassette filmed in hyperReality to set the mood. Fans and the curious will be happy to know you can watch the whole thing on YouTube. Thanks, Internet!) We usually did our tabletop gaming at another friend's house, and each week we carted over several foam-packed boxes of minis, not to mention a fine assortment of TSR-era rulebooks.
When my brother and I started a D&D group, it was natural to bring our miniatures to the table. The desire for affordable miniatures led us to seek out fantasy board games such as the classic Hero Quest and lesser-known but fondly-remembered Dragon Strike. (Dragon Strike came with a VHS cassette filmed in hyperReality to set the mood. Fans and the curious will be happy to know you can watch the whole thing on YouTube. Thanks, Internet!) We usually did our tabletop gaming at another friend's house, and each week we carted over several foam-packed boxes of minis, not to mention a fine assortment of TSR-era rulebooks.
Our primary D&D campaign ended when I was an undergraduate, but I don't think I did any painting after high school. I did a few short-lived and one-off RPG sessions—and designed at least two systems—but time for tabletop RPGs fell away as I got deeper into higher education. Yet, since getting into designer board games many years ago, I know I have been saying that I want to get back into painting miniatures someday.
In a fit of mortality over the Winter break, I became determined to stop saying "someday" and instead to say "tomorrow." Over the next few days, I made several trips to the local art, game, and hobby stores and bought all manner of paints, brushes, and supplies. Since then, I have spent at least an hour painting nearly every night.
Part of what pushed me over the edge was Mice and Mystics. I bought it for the family as a Christmas gift, having heard great things about this cooperative fantasy board game.

I wanted to read the rules ahead of time, so I visited Plaid Hat's product page to download them. On the same page as the rulebook download is Jerry Hawthorne's Painting Guide, a five-page summary of how to paint the minis that come with the game. Hawthorne—the game's designer—lays out exactly what materials a prospective painter would need, and he describes some of the core techniques.
Reading the Painting Guide made me reflect on how, in my youth, I basically just put some paint on the models. It was fairly late in our painting years that my brother and I primed and sealed the figures, and we only did very rudimentary dark washes on undead figures. This was before YouTube, before the popularization of the World Wide Web. Hawthorne writes about drybrushing, lowlighting, inking, and spray paint— things I knew nothing about. However, unlike when I was a kid, now you can punch those into your search engine and discover an abundance of resources, tips, articles, and videos. Reading Hawthorne's guide and poking around the Web gave me the confidence to finally say, "Tomorrow is the day I paint."
As suggested in the Painting Guide, I started with the roaches and the rat warriors. I had never spray-painted anything in my life, so this was a bit of a gamble. I used poster putty to attach the figures to a paint stick and headed to the back porch.

I learned that although it may look like a calm day, the slightest breeze makes spray-painting rather tricky. Still, for my first time, I was pretty happy with it. I tried to make sure every bit was primed. After having done some reading, I think perhaps this was overzealous and led to my using slightly too much primer. This is learning-by-doing, however, and it was a big win for a guy who hadn't painted in two decades.

When I painted two decades ago, I used to just hold the minis in my fingers. I never thought of mounting them to a more manageable surface, but this comes up as a common technique on the Web. Wooden blocks are easy to find in my house, and so I picked out a few stout ones and affixed the roaches to them, using the same poster tack as earlier.

I followed Hawthorne's instructions as closely as I could, recognizing the roaches as low-risk models for trying drybrushing. I was proud of the results, although after having experimented with this technique even more since then, I already see that I was using too much paint. Still, the result is fine for what it is: a greedy little cheese-stealingbastards insects.

Next up in the Painting Guide are the rat warriors, and so I mounted them to the same blocks I used for the roaches.However, this made it awkward to get the paintbrush into the figures' undersides. The roaches are essentially all top, but the rat warriors require more brush dexterity. After a brief consultation with the resident craft wizard, my wife kindly affixed the rat warriors to corks using a low-temperature hot glue gun.
Drybrushing the rats was much more interesting than the roaches, given their texture. I followed the Painting Guide suggestion to do three brown and three grey, knowing that the variation would give me more experience. I was blown away by the efficacy of this simple technique, and I can see why it's so widely recommended as an easy way to add depth to a model. Here are the rat warriors after drybrushing and a few other details:

I was so happy with the drybrushing that I was terrified to take the next step: an ink wash. There's no Control-Z in painting, and it's not like I could rely on refactoring to fix any mistakes I made next. There's nowhere to go but forward, so I held my breath and began the inking.
Fortunately, once again, the results were fantastic. Here is a picture that highlights the difference in the fur and tails: "after" on the left and "before" on the right.
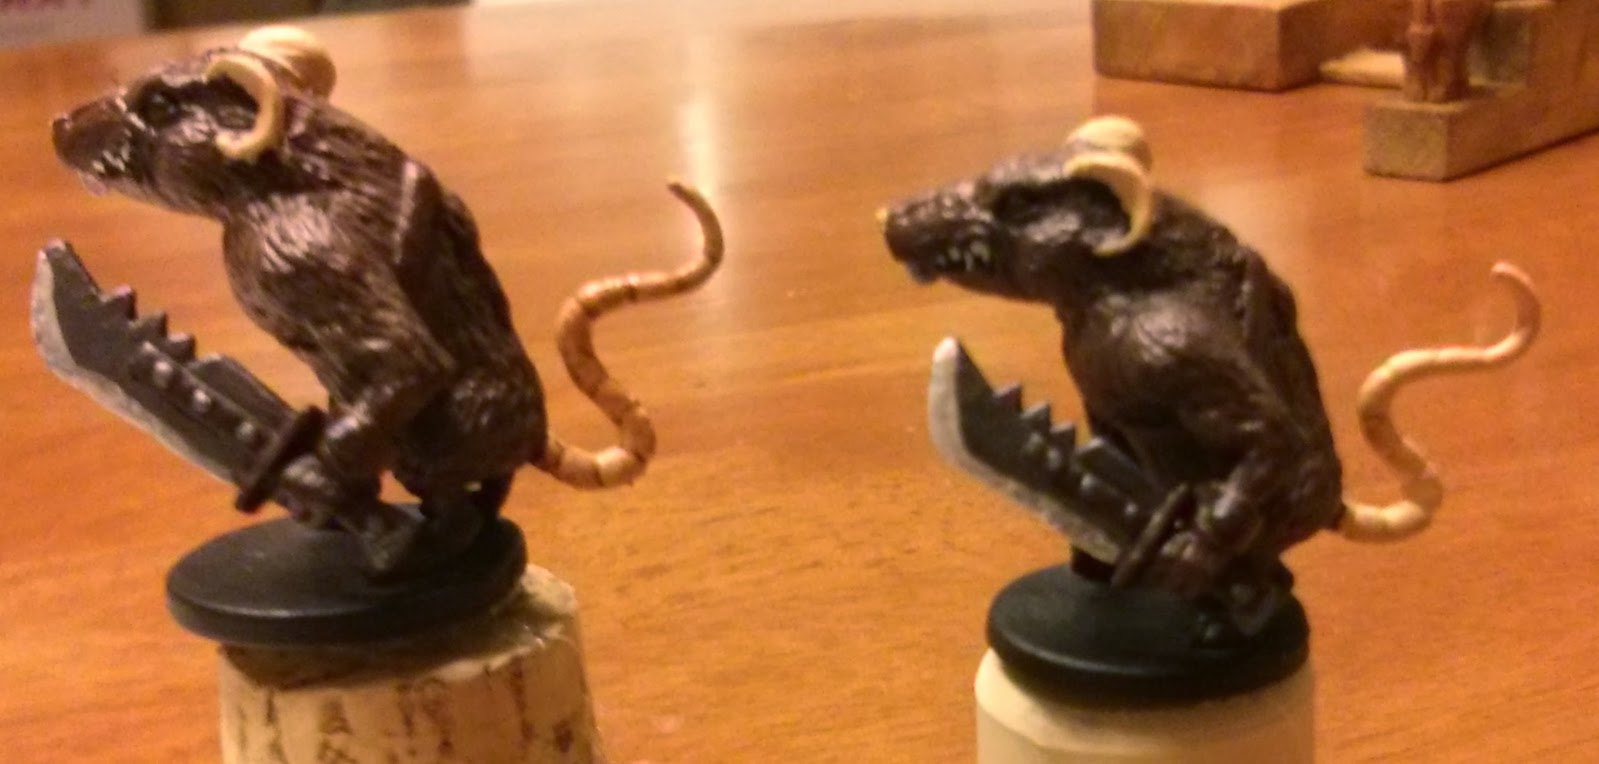
Here are the rat warriors, with all the details complete, before varnish:




I wanted to read the rules ahead of time, so I visited Plaid Hat's product page to download them. On the same page as the rulebook download is Jerry Hawthorne's Painting Guide, a five-page summary of how to paint the minis that come with the game. Hawthorne—the game's designer—lays out exactly what materials a prospective painter would need, and he describes some of the core techniques.
Reading the Painting Guide made me reflect on how, in my youth, I basically just put some paint on the models. It was fairly late in our painting years that my brother and I primed and sealed the figures, and we only did very rudimentary dark washes on undead figures. This was before YouTube, before the popularization of the World Wide Web. Hawthorne writes about drybrushing, lowlighting, inking, and spray paint— things I knew nothing about. However, unlike when I was a kid, now you can punch those into your search engine and discover an abundance of resources, tips, articles, and videos. Reading Hawthorne's guide and poking around the Web gave me the confidence to finally say, "Tomorrow is the day I paint."
As suggested in the Painting Guide, I started with the roaches and the rat warriors. I had never spray-painted anything in my life, so this was a bit of a gamble. I used poster putty to attach the figures to a paint stick and headed to the back porch.
I learned that although it may look like a calm day, the slightest breeze makes spray-painting rather tricky. Still, for my first time, I was pretty happy with it. I tried to make sure every bit was primed. After having done some reading, I think perhaps this was overzealous and led to my using slightly too much primer. This is learning-by-doing, however, and it was a big win for a guy who hadn't painted in two decades.
When I painted two decades ago, I used to just hold the minis in my fingers. I never thought of mounting them to a more manageable surface, but this comes up as a common technique on the Web. Wooden blocks are easy to find in my house, and so I picked out a few stout ones and affixed the roaches to them, using the same poster tack as earlier.
I followed Hawthorne's instructions as closely as I could, recognizing the roaches as low-risk models for trying drybrushing. I was proud of the results, although after having experimented with this technique even more since then, I already see that I was using too much paint. Still, the result is fine for what it is: a greedy little cheese-stealing
Next up in the Painting Guide are the rat warriors, and so I mounted them to the same blocks I used for the roaches.However, this made it awkward to get the paintbrush into the figures' undersides. The roaches are essentially all top, but the rat warriors require more brush dexterity. After a brief consultation with the resident craft wizard, my wife kindly affixed the rat warriors to corks using a low-temperature hot glue gun.
Drybrushing the rats was much more interesting than the roaches, given their texture. I followed the Painting Guide suggestion to do three brown and three grey, knowing that the variation would give me more experience. I was blown away by the efficacy of this simple technique, and I can see why it's so widely recommended as an easy way to add depth to a model. Here are the rat warriors after drybrushing and a few other details:
I was so happy with the drybrushing that I was terrified to take the next step: an ink wash. There's no Control-Z in painting, and it's not like I could rely on refactoring to fix any mistakes I made next. There's nowhere to go but forward, so I held my breath and began the inking.
Fortunately, once again, the results were fantastic. Here is a picture that highlights the difference in the fur and tails: "after" on the left and "before" on the right.
Here are the rat warriors, with all the details complete, before varnish:
I decided next to prime the two big enemy figures—the spider and the centipede. I waited for a calm day, affixed the figures to a paint stick, and headed outside. Through some combination of inexperience and cold weather, it did not go well.I tried to completely coat the models, but because of all the bends and undersides, I ended up with way too much paint pooling into the nooks and crannies. (No pictures taken of this—too much shame.) On the positive side, this gave me the chance to learn something new: stripping! I put the two figures in Xtreme Kleen for a few hours and then took an old toothbrush to them. Most of the paint came off, but not all, and it was much more difficult than I had expected. I wonder if another solvent would have made it easier, but this is what was on hand, so it's what I used.
At this point, I had not yet sealed the roaches or rats because the local stores were out of Testor's Dullcote in a spray can, a product that is widely recommended. My bad experience priming the spider and centipede scared me away from wanting to spray anything, at least until it was warmer outside. I should note that this is when the temperatures were getting into the teens on their way to sub-zero. I made a trip to Toys Forever Models & Hobbies in Muncie, where I had never been before, to see if they had any brush-on primers and sealers. The gentleman behind the counter was very helpful, assisting me in navigating the wide assortment of paints, primers, and accessories. He had what I needed, so I came home excited to varnish my roaches and rat warriors.
I wanted the figures to be durable because they're designed for use in a game—they are not show pieces. Several articles recommended a layer of gloss varnish followed by Dullcote, which will take away the sheen. I tried this first on my roaches, and I have to say it was like magic. My Vallejo brush-on acrylic gloss varnish leaves the figures very shiny, but the Dullcote takes away the plastic look.
This little win got me ready for the spider and the centipede. The hobby shop only had white brush-on primer, so that's what I used, contrary to the Painting Guide's suggestion for black. The white primer dissolved some of the black that was still the minis, leaving them a sickly grey, but at this point, I needed to just move forward. I also discovered that Plaid Hat sells the Mice and Mystics miniatures without the game, so in the very worst case, I could destroy the evidence and buy replacement minis!
I started with a few layers of drybrushing on the models. The centipede came out much darker and redder than I expected, but this was a good experience in mixing custom colors and layering.
I was able to lighten up the centipede with some drybrushing, and both were greatly enhanced by some careful inking. Here they are, complete with evil little eyes, though not yet varnished.
I'm quite happy with how the inking enhanced the segments on the centipede. If I could paint it again, I would do a lighter color on the body but keep the strong inking. I am also happy with the very light brown drybrushing on the back of the spider. It's the most delicate drybrushing I had done to this point, and perhaps the first time I had really done it right.
The last set of figures to paint are the heroes. The recommendations in the Guide are much looser here, taking the reader through general steps but few specific colors or blends. I don't know whether Hawthorne saw this as intentional educational scaffolding or if he simply got tired of writing, but in any case, I had the freedom to succeed or fail on my own.
Good color schemes for each miniature are provided in the Mice and Mystics cards. The minis are not perfect matches for the illustrations, however, so some creative interpretation was required.
The first step—taken from the guide—was to prime the figures in white and ink the details to be dark. Hawthorne mixes his own inks from black paint, water, and Future Floor Wax. I did a bit of research to discover that Future Floor Wax is no longer sold under that name: over the last few years at has been rebranded as Pledge Floor Polish, but it is supposed to have the same formula. In any case, I couldn't find any locally, but I did have some acrylic extender, so I tried this. The resulting "ink" was very thin. I started with Filch and Nez, and they came out much more grey than in the Painting Guide's illustrations. It was while working on the third figure, with a darker mix, that I had an epiphany—ironically, on Epiphany. I was not just undercoating the dark areas. I was painting shadow. I was painting light. I am basically Thomas Kinkade. This helped free me from the illustrations in the guide, which I had previously had difficulty deciphering. I intentionally did a slightly more aggressive inking than in the guide because I wanted to see how this affected the miniatures.
Filch was the first one I painted, the figure on the far left above. He is mostly cloak, and so this was my chance to try "lowlighting." I felt pretty good about understanding drybrushing as a highlighting technique—even if I am still not very good at it—but I had never done lowlighting before. The idea is to mix a darker version of the base color and use it to accent the deep or shadowed areas of the figure. Once again, I approached this with some trepidation, but I was thrilled with the result. Here is the finished Filch's back, showing off the lowlighting and very faint highlighting.
I completely painted and gloss-varnished Filch before moving on to another character. Afterwards, I realized this was inefficient. Several of the mice had recurring colors, such as brown leather, black eyes, pink ears, and dark metal details. I became a bit more pragmatic about my colors as I moved forward, looking at all the remaining figures as I decided what color to mix next.
Collin and Maginos provided good opportunities for me to practice lowlighting. I decided against a third layer of highlighting on these: I was not confident in my ability to predict the right shade, and I thought they looked fine as they were.
Some future archaeologist may study Maginos and wonder why there are so many different layers of color on his fur. Take a look at his illustration from the game:
When I first looked at the picture, I thought he was a light brown mouse with age-whitened fur. I mixed a grey-brown color and painted and inked him, and he looked all wrong, much too brown. I went back to Hawthorne's guide, and he had Maginos as decidedly grey. Given that my original color was a mess, I decided to completely re-do the fur, praying I would not clog any details and have to strip it. Fortunately, I was able to get a nice grey without having to resort to drastic measures.
Another good lesson came in Nez's apron. I painted it a flat beige-brown color, and it looked rather drab. I wasn't sure how to do any lowlighting on it, since there are no folds or wrinkles: it's just a big apron with two pockets in the front. I decided on a brown ink wash, and I think this worked great. All the dynamic shading you see in the picture is due to this simple wash on a rather nondescript portion of the model.
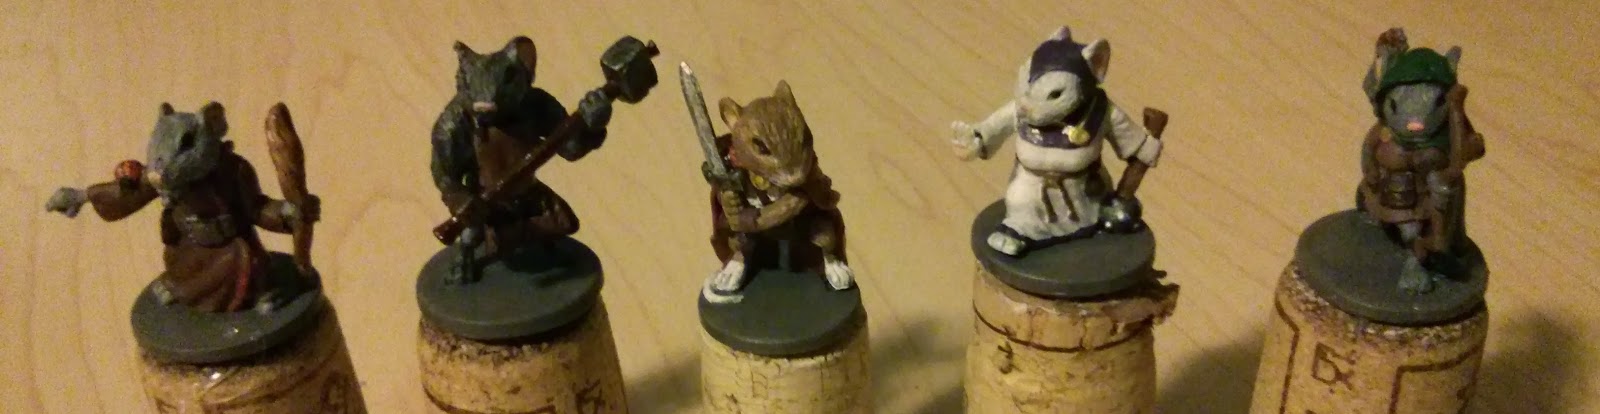
Here are five of the heroes, standing in a line, waiting to be varnished:
The last step was to put on a layer of gloss and a layer of Dullcote. The gloss was finished in the morning, and this reminds me, did you know that Dullcote has a really powerful solvent that will remove thin layers of paint beneath it if you're not careful? I did not know that. Filch had waited so long for his Dullcote, and I was pleased to finally be finishing him. At one point, though, I had to stop and say, "That color should not be there." In my carefree varnishing I pulled a bit of the cloak's ruddy brown right off. Fortunately, I was able to mix a matching color and patch it. It could have been much worse, and my lesson was learned: lighter coats, softer brush. I think once the weather gets warmer, I will get a can of Dullcote and try spraying again. I would at least like to compare the experience to brush-on.
Post touch-up, here are all the heroes, all together, all varnished, waiting to be removed from their corks.
I am really proud of the results. Holding a brush, mixing paints—even cleaning up—it was all very soothing. So much of what I do is intangible: you can't hold software, and you can't "see" the results of careful teaching. With painting, I can point to these miniatures and say happily, "I made these look pretty good."
That said, I know there is still a lot to learn. As I was painting, I thought about how everyone starts as a novice—everyone has to make something bad before they can make something good. I also had to think about how sometimes my students show me things that they are proud of, things that I think are still pretty flawed. When I was overwhelmed and staring uncomprehendingly at the wall of brushes at the hobby shop, perhaps that was what it's like when one of my students first opens Eclipse.
I would love for a few people to look at these miniatures and tell me they like them. I would also love for someone to tell me where to go. What are the biggest mistakes on these that maybe I cannot even see yet? What should I try next?
My next step will be to do some more reading on fundamental techniques. I have several board games with interesting miniatures, including some that get almost no table time. Perhaps The Legend of Drizzt will be next, since my son and I enjoy it, and it has quite a few miniatures. In the meantime, it will be fun to get back into playing Mice and Mystics. We have only played one full game since Christmas, since I've had the figures in various states of being painted since then!
A few words of gratitude are in order. Thanks to Jerry Hawthorne for providing the Painting Guide that gave me the confidence to move forward with something I had been putting off for years. Thanks to my college pal and gaming buddy, Jim, who helped me with some research and troubleshooting from hundreds of miles away. Finally, thanks to my wife, who has supported the resurrection of an old hobby.
Sunday, January 5, 2014
What We Learned in CS222, Fall 2013 edition
For several semesters, I have been using the final exam to collect information about what students value having learned in Advanced Programming. Students work together to come up with a list of items they learned during the semester, and then they vote on which items were most important to them; full details on this approach can be found in my January 2012 blog post and my 2013 SIGCSE paper. I first used this format in Fall 2010, and I shared results from Spring 2013 in my post from May 2013. This table summarizes the top items from four different semesters:
It might be worth noting that the first two columns used Joshua Bloch's Effective Java as a primary text, and the latter two used Robert C. Martin's Clean Code.
This past Fall was my first experiment in coupling achievement-oriented assessment with essential questions, maintaining my usual emphasis on reflective writing; I wrote a bit about that experiment just the other day. Looking at the results from Fall, here are the most popular "What We Learned" statements:
It is interesting to me that instead of simply saying they learned "Clean Code" as in previous semesters, these students agreed that Clean Code takes practice. It may be just anecdote, but this was the first semester that I allowed resubmission of work—part of my attempt to encourage mastery learning. Although I frequently felt like my feedback was not being heeded during the semester, perhaps this indicates that the resubmission policy helped students learn something quite valuable: not just the idea of Clean Code, but that putting these ideas into practice is difficult.
The middle row—it's OK to fail or start over—may be related to the resubmission policy. However, I suspect it is more directly related to the final projects. There was more than one team to whom I gave the same advice after two or three iterations, only to have them still not follow it. Some teams made significant platform changes between iterations, changes that forced them to abandon large parts of their implementation. I think that this is an important step in the students' maturation: they likely never had to throw away working code before, nor did they have to deal with a changing definition of "working."
I am pleased to see "How to reflect on work" was one of the top items, since the students spent a great deal of time during the semester writing achievement reflections. Although I have changed the balance of achievements and reflections for the Spring, as described in my previous post, I hope that this Spring's group will have a similarly positive experience regarding reflective practice.
| Fall 2010 | Fall 2011 | Fall 2012 | Spring 2013 |
|---|---|---|---|
| Team programming | Object-oriented design | Clean Code | DRY |
| Test-Driven Development | Coding conventions | Teamwork | Clean Code |
| Use of software libraries | Agile Manifesto | SRP | Build one to throw away |
| Refactoring | Effective Java | Class design | Refactoring |
| UML | Test-Driven Development | Naming Conventions | |
| Design patterns | Stack Overflow | Research before acting |
It might be worth noting that the first two columns used Joshua Bloch's Effective Java as a primary text, and the latter two used Robert C. Martin's Clean Code.
This past Fall was my first experiment in coupling achievement-oriented assessment with essential questions, maintaining my usual emphasis on reflective writing; I wrote a bit about that experiment just the other day. Looking at the results from Fall, here are the most popular "What We Learned" statements:
| Item | Votes |
|---|---|
| Clean Code takes practice | 13 |
| Pair programming | 10 |
| It's OK to fail or start over | 6 |
| How to reflect on work | 5 |
| User stories | 5 |
It is interesting to me that instead of simply saying they learned "Clean Code" as in previous semesters, these students agreed that Clean Code takes practice. It may be just anecdote, but this was the first semester that I allowed resubmission of work—part of my attempt to encourage mastery learning. Although I frequently felt like my feedback was not being heeded during the semester, perhaps this indicates that the resubmission policy helped students learn something quite valuable: not just the idea of Clean Code, but that putting these ideas into practice is difficult.
The middle row—it's OK to fail or start over—may be related to the resubmission policy. However, I suspect it is more directly related to the final projects. There was more than one team to whom I gave the same advice after two or three iterations, only to have them still not follow it. Some teams made significant platform changes between iterations, changes that forced them to abandon large parts of their implementation. I think that this is an important step in the students' maturation: they likely never had to throw away working code before, nor did they have to deal with a changing definition of "working."
I am pleased to see "How to reflect on work" was one of the top items, since the students spent a great deal of time during the semester writing achievement reflections. Although I have changed the balance of achievements and reflections for the Spring, as described in my previous post, I hope that this Spring's group will have a similarly positive experience regarding reflective practice.
Thursday, January 2, 2014
Tweaking achievements and reflections
Before the start of the Fall 2013 semester, I wrote about the changes I was incorporating into CS222, the Advanced Programming class. With that semester behind us, I can say that it went well, although not without the need for tweaks. For the Spring, I am keeping the fundamental structure. Here is a summary and justification for the tweaks.
I am scaling down the number of achievements required for each grade level. The original plan in the Fall was two achievements per week. However, students were not as adept as I had hoped at aligning achievements and projects. The intention was that students would earn achievements by doing their projects, but the majority of the class tried to do achievements separately from the projects. In the Fall, we ended up making a change midstream, reducing the number required during the nine-week project to only one per week. For the Spring, I'm pulling back a little bit more, expecting two achievements per week during the first three weeks, then only one per week during the two-week "warm-up" project and the nine-week major project.
Another change addresses the intended achievement-project synergy: restricting the code that can be used to complete achievements. When working toward achievements, Fall's students were permitted to use any code to which they had a license. In practice, I had students submitting trivial modifications to terribly-conceived CS1 and CS2 projects all the way to the end of the semester. In Spring, students can use any such code during the first third of the semester, but once they start their nine-week projects, they must use either that code or public open source code.
I have also changed the how and when reflections are required. In Fall's section, students wrote one reflection per achievement. I am sure that the best students—those on the road to being reflective practitioners—found this fruitful, albeit time-consuming. The students with worse writing skills spent inordinate time on these reflections, time that should have been spent understanding the material instead. Their action was justified, perhaps, by the fact that reflections were a significant part of the course grade. Also, I allowed resubmission of the reflections, but I think my attempt to encourage mastery learning instead fostered the"submit and hope" approach that I find so endemic and disdainful. In the Spring, the students will instead be asked to write one reflection per week, and this reflection may focus on any course-related experience: achievements, in-class discussions, project team discoveries, and so on.
The structure of the reflections will change as well. In the Fall, students were asked to do three things in their reflections: characterize an essential question, describe implications to practice, and consider alternative perspectives. Many students struggled with these all semester. Although I believe that tackling these problems is good for students, there is a limited about of time students can devote to this class. Hence, I have reduced and rearticulated the requirements: in the Spring, students will be asked to address one of the essential questions ("characterize" caused undue problems) and describe implications to practice.
Despite the addition of achievements and structured essays, perhaps the most uncertain of my Fall experiments was in not grading the final projects. As mentioned above, the course design was supposed to foster students' intrinsic motivation to work on the projects, which would provide context for the achievements. My ambitious designs failed to account for the pragmatic, goal-directed nature of the undergraduate! Students realized that the projects were not graded, and many students found this unmotivating: they wanted their work to be recognized directly in their grades. I will be returning to my conventional approach, grading both the projects and their ancillary artifacts such as presentations and a final report.
A final significant change that I expect to bring vast improvements is getting off of Blackboard. We used Blackboard's wiki in the Fall as a place for students to post and share their achievement artifacts. The wiki is ghastly, and because it was so difficult to give targeted feedback, we ended up with a very poor signal to noise ratio. Often, a student would post something that was wrong, and I would give formative evaluation to that student, encouraging revision; the student would not revise, and within a few days, I would receive several similar submissions from students who assumed the original was correct. What a mess. In the Spring, we're going to use Google Drive instead. I am uneasy about requiring students to register for a Google Account in order to participate, but most have them anyway, and the technology stack is so vastly superior that I'm going to try it. I will set up a shared folder that will contain one document per achievement, and students will post their artifacts within those documents. My feedback can take the form of comments, which are visible to all readers. I will have a bit of manual work to translate these data into Blackboard's gradebook, but that's worth it to help close the gap between my feedback and peer learning.
I finished up the course description this morning and linked it to my Web page. The achievements themselves are basically the same as the ones I designed last Summer, with a few notable additions that reward technology (integration with relational databases and structured data parsers) as well as community-building (interviewing alumni and senior capstone teams). Each achievement has also been clarified as to what exactly the corresponding artifact is—some had been vague in the previous iteration.
The semester starts in just a few days, and I'm looking forward to meeting the new crop of CS222 students. I am not looking forward to teaching at 8AM and Monday's high of -6°F, but I am trying not to complain.
But seriously, 8AM and -6°F high temperature.
I am scaling down the number of achievements required for each grade level. The original plan in the Fall was two achievements per week. However, students were not as adept as I had hoped at aligning achievements and projects. The intention was that students would earn achievements by doing their projects, but the majority of the class tried to do achievements separately from the projects. In the Fall, we ended up making a change midstream, reducing the number required during the nine-week project to only one per week. For the Spring, I'm pulling back a little bit more, expecting two achievements per week during the first three weeks, then only one per week during the two-week "warm-up" project and the nine-week major project.
Another change addresses the intended achievement-project synergy: restricting the code that can be used to complete achievements. When working toward achievements, Fall's students were permitted to use any code to which they had a license. In practice, I had students submitting trivial modifications to terribly-conceived CS1 and CS2 projects all the way to the end of the semester. In Spring, students can use any such code during the first third of the semester, but once they start their nine-week projects, they must use either that code or public open source code.
I have also changed the how and when reflections are required. In Fall's section, students wrote one reflection per achievement. I am sure that the best students—those on the road to being reflective practitioners—found this fruitful, albeit time-consuming. The students with worse writing skills spent inordinate time on these reflections, time that should have been spent understanding the material instead. Their action was justified, perhaps, by the fact that reflections were a significant part of the course grade. Also, I allowed resubmission of the reflections, but I think my attempt to encourage mastery learning instead fostered the"submit and hope" approach that I find so endemic and disdainful. In the Spring, the students will instead be asked to write one reflection per week, and this reflection may focus on any course-related experience: achievements, in-class discussions, project team discoveries, and so on.
The structure of the reflections will change as well. In the Fall, students were asked to do three things in their reflections: characterize an essential question, describe implications to practice, and consider alternative perspectives. Many students struggled with these all semester. Although I believe that tackling these problems is good for students, there is a limited about of time students can devote to this class. Hence, I have reduced and rearticulated the requirements: in the Spring, students will be asked to address one of the essential questions ("characterize" caused undue problems) and describe implications to practice.
Despite the addition of achievements and structured essays, perhaps the most uncertain of my Fall experiments was in not grading the final projects. As mentioned above, the course design was supposed to foster students' intrinsic motivation to work on the projects, which would provide context for the achievements. My ambitious designs failed to account for the pragmatic, goal-directed nature of the undergraduate! Students realized that the projects were not graded, and many students found this unmotivating: they wanted their work to be recognized directly in their grades. I will be returning to my conventional approach, grading both the projects and their ancillary artifacts such as presentations and a final report.
A final significant change that I expect to bring vast improvements is getting off of Blackboard. We used Blackboard's wiki in the Fall as a place for students to post and share their achievement artifacts. The wiki is ghastly, and because it was so difficult to give targeted feedback, we ended up with a very poor signal to noise ratio. Often, a student would post something that was wrong, and I would give formative evaluation to that student, encouraging revision; the student would not revise, and within a few days, I would receive several similar submissions from students who assumed the original was correct. What a mess. In the Spring, we're going to use Google Drive instead. I am uneasy about requiring students to register for a Google Account in order to participate, but most have them anyway, and the technology stack is so vastly superior that I'm going to try it. I will set up a shared folder that will contain one document per achievement, and students will post their artifacts within those documents. My feedback can take the form of comments, which are visible to all readers. I will have a bit of manual work to translate these data into Blackboard's gradebook, but that's worth it to help close the gap between my feedback and peer learning.
I finished up the course description this morning and linked it to my Web page. The achievements themselves are basically the same as the ones I designed last Summer, with a few notable additions that reward technology (integration with relational databases and structured data parsers) as well as community-building (interviewing alumni and senior capstone teams). Each achievement has also been clarified as to what exactly the corresponding artifact is—some had been vague in the previous iteration.
The semester starts in just a few days, and I'm looking forward to meeting the new crop of CS222 students. I am not looking forward to teaching at 8AM and Monday's high of -6°F, but I am trying not to complain.
But seriously, 8AM and -6°F high temperature.
Wednesday, December 11, 2013
A semester in five burndown charts
It's the end of the semester here, and I am looking forward to writing a bit about the semester once its behind us. In the meantime, here's a visual vignette about my Game Programming course. We had a great team of students working on original video games with a community partner. The semester was divided into five Sprints, following the principles of Scrum. We used burndown charts to track progress throughout the Sprint, plotting actual hours remaining (green) against steady progress (blue).
I find that these five images tell an interesting story of a team's progress. The students had never worked together before, and most of them had never been part of an agile team. They were learning not just technical skills but also professional and social ones. The charts illustrate this learning during the semester, as they improve with their abilities to estimate, to plan, to deliver technical results, and to respond to changes.


I find that these five images tell an interesting story of a team's progress. The students had never worked together before, and most of them had never been part of an agile team. They were learning not just technical skills but also professional and social ones. The charts illustrate this learning during the semester, as they improve with their abilities to estimate, to plan, to deliver technical results, and to respond to changes.


That bump in Sprint 2 is interesting. The team recognized that many problems in the first sprint came from a combination of procrastination and poor estimation. They started in on their tasks right away in Sprint 2, and when things didn't go as well as hoped, they blew up the estimated hours remaining on those tasks. It turns out that the tasks weren't as bad as they feared, and as they worked through their problems, the estimates dropped back down to more accurate levels.
The erratic path in Sprint 5 illustrates that the team underestimated the effort required to polish the games for public release. Interestingly, the burndown chart was still useful even though the estimates were quite wrong. The team could look at the chart, which said they were dozens of hours ahead of steady, while knowing that there was still significant work to be done. This discordance forced them to re-evaluate their tasks and estimates, to reconsider the sprint's plan, and eventually, to successfully deliver on every user story.
Tuesday, October 8, 2013
A Concept Dependency Graph Analysis of Dominion
Just five years ago, Rio Grande Games published Donald Vaccarino's deck-building card game, Dominion, and it took the designer game world by storm. In short order, it seemed that every publisher was riffing on this new mechanic, and now, deck-building is an established game mechanism in any designer's toolbox. I include Dominion on my list of recommended games in my game design course because of its popularity and its influence in game design: this game provides the metric by which other deck-building games are judged.

Three recent situations inspired me to look at Dominion more critically—particularly, how one learns, teaches, and conceptualizes the game.
First, one of my game design students wrote a critical analysis of Dominion, and a significant portion of her analysis was based on the opinion that the rulebook was unclear. Specifically, she and her opponent were unable to determine when they were to discard their cards and draw new ones. I was surprised at this, in part because I had a student last year who upheld the same rulebook as a pillar of clarity. It may be worth noting that last year's student self-identifies as a "gamer," whereas this year's student had never heard of Dominion prior to taking my course. In any case, this was not the result I expected.
Second, I was recently with a group of friends who were teaching Dominion to a new player. They began by explaining actions and the chaining of actions and the strategic importance of this tactic, but before they had even taken any cards out of the box. This struck me as a particularly awkward way to introduce the game, since concepts such as "you're building your own deck" were not yet discussed, and it clearly was not resonating with the new player. In fact, his questions revealed that despite several minutes of accurate rule explanation, he had not built a coherent mental model of the game. This suggests to me that it wasn't a problem of accuracy, but of scaffolding—that is, giving the right information at the right time for the learner to advance.
Third, I was retelling the stories above to my lovely wife, and I explained that I thought it was important to focus on core gameplay when teaching a game. I justified that you cannot make sense out of peripheral game design elements without understanding the core, and therefore you should teach games from the core outward. She pointed out to me that sometimes she gets confused when I explain games this way because I don't give enough "big picture." Touché.
This got me thinking about the relationship between core gameplay and learning, and more specifically, how the dependencies among game concepts might reveal effective means for teaching the game. While many designers talk about "core gameplay," there is not consensus on where one draws the line around what is "core" and what is not. I decided to try mapping out the concepts required to play a game of Dominion as well as the dependencies among them, and this is what I came up with:
This is a concept dependency graph, where the nodes represent gameplay concepts and the edges represent dependencies. That is, given A→B, one needs to understand concept B in order to understand concept A. I will refer to terminal nodes with no dependencies as atomic concepts. I am only considering the original Dominion game—no expansions—and only those kingdom cards recommended for new players. I also omitted concepts that were not relevant to gameplay, such as the use of randomizers or the determination of starting player.
The graph was drawn using dot, part of the graphviz project. Dot generates layered graphs (that is, each node is in a discrete layer) and follows automatic graph drawing heuristics such as minimizing crossings, minimizing edge length, and maintaining aspect ratio. A quick look at the graph shows a potential "core" of the game emerging from the atomic concept "Each player has their own cards."
If someone had never played a deck-building game before, I think this sets up a compelling description: it's a game in which you have your own deck of cards from which you draw a hand, then you play actions and buy new cards from stacks on the table, and you cycle your discard pile back into your deck when it is exhausted. There's no mention here of what those actions actually are, or the "cleanup" phase, or even victory condition, but I think it's fair to argue that these aren't part of the core gameplay. Keep in mind that "core gameplay" is not rigorously defined; one could just as well argue that the victory condition should be in the core, and be justified. That is, I'm not saying that this is right, but that it satisfices.
The concept dependency graph has three atomic concepts: each player has their own cards; there are stacks of cards in the center of the table; and there is a trash pile. Of these, the last is almost certainly not part of the core gameplay: it's an design element that permits a small number of kingdom cards to permanently remove cards from a game. Like the numerous Dominion expansion, it is a design element that permits the introduction of more action variations. It is interesting that the computer-optimized drawing of this graph put the trash pile atomic concept on the periphery of the drawing, where as the fact that there are stacks of cards ends up "wrapped" within other dependencies.
I knew I wanted a hierarchical drawing of the graph because I was looking explicitly for layers of concepts. I was curious, however, as to whether a force-directed drawing would yield any further insight. The result of running the graph through neato is given below. There's no new insight to be had from this visualization, at least not as relates to finding a potential core gameplay.
The concept dependency graph provided an interesting tool for analyzing Dominion, particularly with respect to the search for core gameplay. I am curious as to whether this tool can be used on other existing games to similarly fruitful ends or whether this is a coincidence. What I have shared here is the third major version of my concept dependency graph for Dominion: the previous versions did not induce any visual "core", but they also contained what I considered to be mistakes in the concept and dependency articulation.
This project has made me wonder whether other graph formalisms might reveal new insights into game design. A propositional network, for example, permits separate reasoning about cards and the having of cards. I did a bit of work with SNePS in graduate school, and it might be a useful tool to deploy here. I know that Machinations presents a formal language for representing game design elements, but I know relatively little about it; it may provide some insight into the learnability of games and core gameplay as well. I am curious to hear from anyone who has tried either tool toward these ends.
If you find any other uses for this formalism in studying game design and learning, or if you know of any related work in the literature, please leave a note in the comments. Thanks for reading!

Three recent situations inspired me to look at Dominion more critically—particularly, how one learns, teaches, and conceptualizes the game.
First, one of my game design students wrote a critical analysis of Dominion, and a significant portion of her analysis was based on the opinion that the rulebook was unclear. Specifically, she and her opponent were unable to determine when they were to discard their cards and draw new ones. I was surprised at this, in part because I had a student last year who upheld the same rulebook as a pillar of clarity. It may be worth noting that last year's student self-identifies as a "gamer," whereas this year's student had never heard of Dominion prior to taking my course. In any case, this was not the result I expected.
Second, I was recently with a group of friends who were teaching Dominion to a new player. They began by explaining actions and the chaining of actions and the strategic importance of this tactic, but before they had even taken any cards out of the box. This struck me as a particularly awkward way to introduce the game, since concepts such as "you're building your own deck" were not yet discussed, and it clearly was not resonating with the new player. In fact, his questions revealed that despite several minutes of accurate rule explanation, he had not built a coherent mental model of the game. This suggests to me that it wasn't a problem of accuracy, but of scaffolding—that is, giving the right information at the right time for the learner to advance.
Third, I was retelling the stories above to my lovely wife, and I explained that I thought it was important to focus on core gameplay when teaching a game. I justified that you cannot make sense out of peripheral game design elements without understanding the core, and therefore you should teach games from the core outward. She pointed out to me that sometimes she gets confused when I explain games this way because I don't give enough "big picture." Touché.
This got me thinking about the relationship between core gameplay and learning, and more specifically, how the dependencies among game concepts might reveal effective means for teaching the game. While many designers talk about "core gameplay," there is not consensus on where one draws the line around what is "core" and what is not. I decided to try mapping out the concepts required to play a game of Dominion as well as the dependencies among them, and this is what I came up with:
 |
| Concept dependency graph for Dominion. |
The graph was drawn using dot, part of the graphviz project. Dot generates layered graphs (that is, each node is in a discrete layer) and follows automatic graph drawing heuristics such as minimizing crossings, minimizing edge length, and maintaining aspect ratio. A quick look at the graph shows a potential "core" of the game emerging from the atomic concept "Each player has their own cards."
 |
| Concept dependency graph, detail of potential "core" |
The concept dependency graph has three atomic concepts: each player has their own cards; there are stacks of cards in the center of the table; and there is a trash pile. Of these, the last is almost certainly not part of the core gameplay: it's an design element that permits a small number of kingdom cards to permanently remove cards from a game. Like the numerous Dominion expansion, it is a design element that permits the introduction of more action variations. It is interesting that the computer-optimized drawing of this graph put the trash pile atomic concept on the periphery of the drawing, where as the fact that there are stacks of cards ends up "wrapped" within other dependencies.
Choosing only the ten basic kingdom cards allowed me to ignore Curse cards in my concept dependency graph. However, Moat is included in this set, and it required adding several concepts and dependencies. Without Moat, it doesn't matter that Militia is an Attack card, and so that concept could be elided. Moat is a Reaction, and so that requires an explanation. Moat is also the only card in the set that has two different actions on it, from which the player must choose one; in all other cases, the player does everything on the card when it is played. This provides some justification for not including Moat as a beginner card, despite its gameplay utility in foiling Militia. It would be an interesting study to compare beginners' ability to learn the game with and without Moat to see if there was any significant difference.
It is noteworthy that the "ABC" concepts—that your turn comprises Action, Buy, and Cleanup—are relatively deep in the graph. You cannot really make sense of ABC unless you know what Action, Buy, and Cleanup mean. However, my experience shows that it still provides a memorable peg on which to hang your hat when teaching the game. That is, I propose that the mnemonic is there because these are not atomic concepts. Similarly, the atomic concepts manifest in directly observable configurations: without knowing anything about how the game is played, one can see that players have their own cards (based on players' handling them and placing them in easy reach), you can see stacks on the table, and there is a single "Trash" card among these stacks.
It is noteworthy that the "ABC" concepts—that your turn comprises Action, Buy, and Cleanup—are relatively deep in the graph. You cannot really make sense of ABC unless you know what Action, Buy, and Cleanup mean. However, my experience shows that it still provides a memorable peg on which to hang your hat when teaching the game. That is, I propose that the mnemonic is there because these are not atomic concepts. Similarly, the atomic concepts manifest in directly observable configurations: without knowing anything about how the game is played, one can see that players have their own cards (based on players' handling them and placing them in easy reach), you can see stacks on the table, and there is a single "Trash" card among these stacks.
I knew I wanted a hierarchical drawing of the graph because I was looking explicitly for layers of concepts. I was curious, however, as to whether a force-directed drawing would yield any further insight. The result of running the graph through neato is given below. There's no new insight to be had from this visualization, at least not as relates to finding a potential core gameplay.
 |
| Force-directed drawing of the concept dependency graph |
This project has made me wonder whether other graph formalisms might reveal new insights into game design. A propositional network, for example, permits separate reasoning about cards and the having of cards. I did a bit of work with SNePS in graduate school, and it might be a useful tool to deploy here. I know that Machinations presents a formal language for representing game design elements, but I know relatively little about it; it may provide some insight into the learnability of games and core gameplay as well. I am curious to hear from anyone who has tried either tool toward these ends.
If you find any other uses for this formalism in studying game design and learning, or if you know of any related work in the literature, please leave a note in the comments. Thanks for reading!
Tuesday, October 1, 2013
Two-Week Project Showcase
The focus of my sophomore-level Advanced Programming course (CS222) is a large project at the end of the semester. In the past, this has been a six-week project, delivered in two three-week iterations. It is a project of the students' own invention: they have to pitch a project to satisfy a set of constraints I provide. This semester, I decided to expand the project to nine weeks with three iterations. This goes hand-in-glove with the revised, achievement-oriented assessment model that I am using this semester.
Most students have never worked in a programming team prior to CS222, much less defined their own projects. To warm them up, I give a two-week programming project before starting the big project. The two-week project is done in pairs, and I provide the requirements analysis as user stories. This provides a model for them to follow when they pitch their own projects using user stories.
This semester, I gave a new two-week project that was inspired by my 2013 Global Game Jam project. The students were challenged to write an application that takes a word from the user and then hits Wikipedia's API to determine the last modified date of the corresponding page. The curriculum provides no prior exposure to Web programming or networking, and so I provided a very short sample program that demonstrated how to open a URL in Java and read the stream. This project touches on some very important ideas, including Web services and structured data.
In the past, I have evaluated the two-week project in a rather conventional way: I provide a grading rubric at the start of the project, then I check out students' projects from the department's Mercurial server and give each pair a grade. I wanted to do it differently this semester, in part because of the achievement-oriented assessment. The two-week project provides a vehicle for students to earn achievements and write reflections: I'm not evaluating the project itself but rather how students use it to explore course concepts as articulated through the achievements and essential questions.
I decided to devote a class day at the end of the two-week project to a showcase. Each pair had to have a machine running a demo alongside a summary poster. We rearranged the classroom, moving all the tables to the perimeter and clustering the extras in the center. In order to foster peer interaction, I printed some sheets whereby students could vote on which team had the best UI, the best poster design, the cleanest code, and the most robust input handling.
The students enjoyed this format. There was an energy in the room as the students explored each others' solutions, talking about implementation strategies and UI decisions. A few students had trouble getting their projects working at all, and I heard one student say how disappointed he was, because it left his team unable to fully participate in the activity. This represents positive peer pressure and project orientation, which can be starkly contrasted against instructor pressure and grading-orientation.
I had recommended two strategies in class: using Joda Time to handle time formatting and using Java's DOM parser to deal with Wikipedia's output. I was surprised to see that almost every team used Joda Time (and used it to earn the Third Party Librarian achievement) but only one team used DOM. Every other team read the output stream as a single string and then searched it using Java's
Keep in mind that this is coming in as one continuous stream without linebreaks. Aside from the one group that did an appropriate and simple DOM lookup, students used
If you ask the application for the last modified info of the Wikipedia page "timestamp=", you get a phenomenon similar to an SQL injection attack: the
When I explained to the students what were doing at the showcase, I had expected teams to show up at their stations when I came by. However, it seems they were so excited to see each others' work that they didn't think about this. Since not every team had a person at their station when I came around, I was not able to give my expert evaluation to each group, nor was I able to model for the students how to give critical feedback. On the other hand, the students got a lot of peer feedback and I was able to meld into the group, becoming just one of many people interested in seeing demonstrations and code. I am not yet sure if I would do this part differently next time or not.
One aspect that is still unclear to me is the extent to which students were working for intrinsic motivation versus extrinsic reward. I was approached after class by a student from one of the teams whose solution was not working. During the hour, they had talked to other students and realized what they did wrong, which is an activity I certainly want to foster. The student asked, clearly in a state of agitation, if his group could fix their application even though it was due to be completed the previous night. I confirmed that this would be fine, and the student went away expressing joy and thanksgiving. I suspect his perspective was that he had just been given an opportunity to save his grade. What I really gave him was an opportunity to make his project work and feel good about getting it done, even if a bit late. I don't think he realized that there's no entry in the course grading policy for the two-week project, that the whole thing was just a fun context for us all to play and learn together. I hope that when he figures this out, he sees this as a reflective learning opportunity and not simply smoke and mirrors.
In conclusion, I am very happy with the showcase format. It was definitely worth using a class meeting for this event. I think this two-week project was particularly well-suited to the showcase format since it's fairly small, permits multiple solutions, helps students build better understandings of the modern computing ecosystem, and can have interesting failure states. Perhaps next time around I need to add an achievement related to XML parsing, since this seemed to promote students' use of Joda Time quite well.
(I have some nice pictures of the showcase that I took while standing on top of the teaching station, but I feel like I can't post them here without my students' permission. Sorry.)
String class. This provided an excellent opportunity to teach about input validation. My sample Wikipedia URL queried the "soup" page for its last modified time, and the result looks like this:<?xml version="1.0"?>
<api>
<query-continue>
<revisions rvcontinue="574699285" />
</query-continue>
<warnings>
<revisions xml:space="preserve">Action 'rollback' is not allowed for the current user</revisions>
</warnings>
<query>
<normalized>
<n from="soup" to="Soup" />
</normalized>
<pages>
<page pageid="19651298" ns="0" title="Soup">
<revisions>
<rev timestamp="2013-09-27T05:20:10Z" />
</revisions>
</page>
</pages>
</query>
</api>
Keep in mind that this is coming in as one continuous stream without linebreaks. Aside from the one group that did an appropriate and simple DOM lookup, students used
String#indexOf(String) to search for "timestamp=", and then did manual string parsing using that reference point. This approach works for most cases, but it opens the application up to an attack that I'll explain in the next paragraph, giving the reflective reader a moment to consider it.If you ask the application for the last modified info of the Wikipedia page "timestamp=", you get a phenomenon similar to an SQL injection attack: the
indexOf operation picks up an unintended location, and the manual string manipulations fail. I had seen this when meeting with a pair the previous week who were working on their Advice Seeker achievement. They had thought their solution to be rock solid, and they were appropriately excited when I showed them how to crash it. They became my covert hitmen during the showcase, crashing solution after solution by finding holes in string parsing logic. So, while few students took the opportunity to learn XML parsing in the two-week project, maybe they learned something even better: the embarrassment of doing it the lazy way and seeing your system go down in public!When I explained to the students what were doing at the showcase, I had expected teams to show up at their stations when I came by. However, it seems they were so excited to see each others' work that they didn't think about this. Since not every team had a person at their station when I came around, I was not able to give my expert evaluation to each group, nor was I able to model for the students how to give critical feedback. On the other hand, the students got a lot of peer feedback and I was able to meld into the group, becoming just one of many people interested in seeing demonstrations and code. I am not yet sure if I would do this part differently next time or not.
One aspect that is still unclear to me is the extent to which students were working for intrinsic motivation versus extrinsic reward. I was approached after class by a student from one of the teams whose solution was not working. During the hour, they had talked to other students and realized what they did wrong, which is an activity I certainly want to foster. The student asked, clearly in a state of agitation, if his group could fix their application even though it was due to be completed the previous night. I confirmed that this would be fine, and the student went away expressing joy and thanksgiving. I suspect his perspective was that he had just been given an opportunity to save his grade. What I really gave him was an opportunity to make his project work and feel good about getting it done, even if a bit late. I don't think he realized that there's no entry in the course grading policy for the two-week project, that the whole thing was just a fun context for us all to play and learn together. I hope that when he figures this out, he sees this as a reflective learning opportunity and not simply smoke and mirrors.
In conclusion, I am very happy with the showcase format. It was definitely worth using a class meeting for this event. I think this two-week project was particularly well-suited to the showcase format since it's fairly small, permits multiple solutions, helps students build better understandings of the modern computing ecosystem, and can have interesting failure states. Perhaps next time around I need to add an achievement related to XML parsing, since this seemed to promote students' use of Joda Time quite well.
(I have some nice pictures of the showcase that I took while standing on top of the teaching station, but I feel like I can't post them here without my students' permission. Sorry.)
Subscribe to:
Posts (Atom)