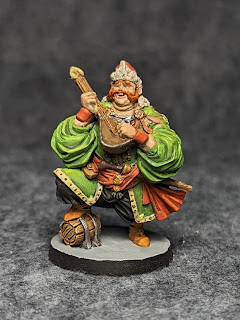
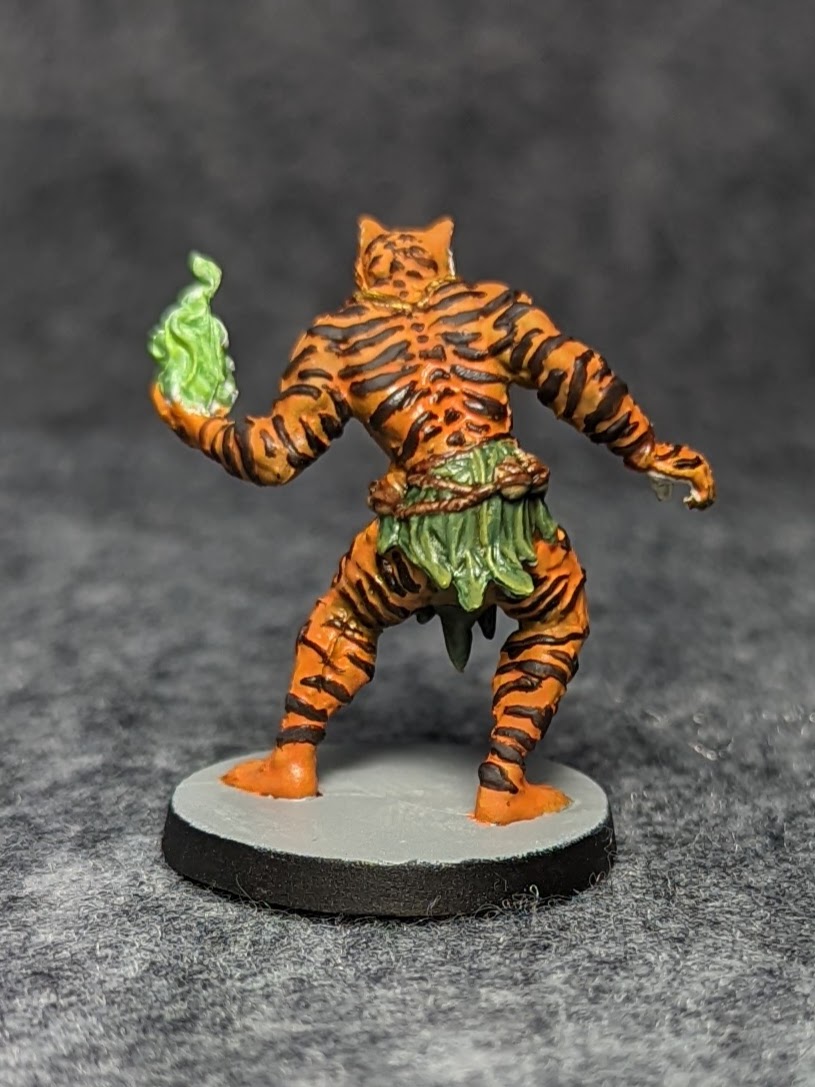
Berko the Cursed is where I started painting, and this was hands down the worst experience of the set. Looking at the card art, I was concerned about the care it would take to freehand the tiger stripes. Looking at the sculpt, I was shocked to see that the stripes are actually molded into the figure. This has the effect of making it look striped while unpainted, which is kind of nice for non-painters I suppose, but painted, it just looks
goofy. Tigers' stripes are not raised. Further, because they are raised, you're locked in as a painter to follow those lines even though they're not very good as tiger stripes go. It was tempting to shave them all off. Adding another layer of badness is the necklace decoration. He is leaning forward, and in the card art, his necklace decorations appropriately dangle in front of his chest. The sculpt keeps the pose but presses the decorations against his chest because they could not be easily cast any other way. It struck me as an oddly amateurish move from a company named for Cool Minis.
Still, the idea of playing a tiger-guy is kind of neat, and everyone likes green magic flame.
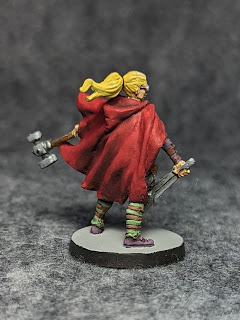
 |
| Zuri (front) |
 |
| Zuri (back) |
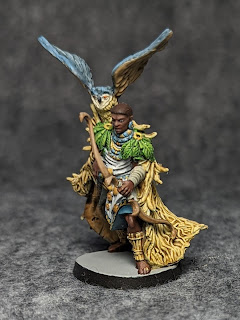
The other druid is Zuri. She was fun to paint although the twiggy cape was kind of uninteresting. I could have dressed it up with some different tones, but I decided to just take a simple approach. It wasn't until writing this that I realized the photo doesn't clearly show the nice triangle patterns on the front of her outfit, but you can see that better in the image below.
The Druid hero box comes with three animal tokens, but the Kickstarter Darkbringer pack upgrades these to miniatures. I pulled those out and included them in the set, like I did for the base set Shaman's Fire and Ice spirits.
 |
| Bear (front) |
 |
Bear (back)
|
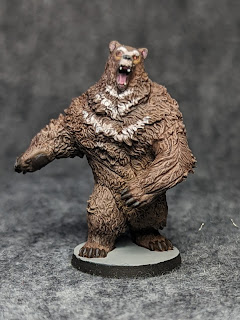
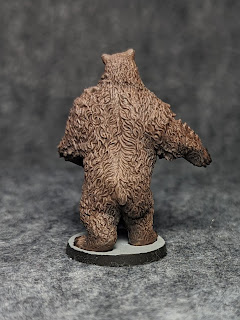
The bear was a pretty quick paint job inspired by
Sorastro's wookie video, which I'm sure I've mentioned and linked before. I wet-blended the areas of highlight and shade, used a wash over the whole thing to bring out the shadows and merge the colors, and then did some selective drybrushing and washes to get better highlights and shadows.
 |
| Eagle (front) |
 |
| Eagle (back) |
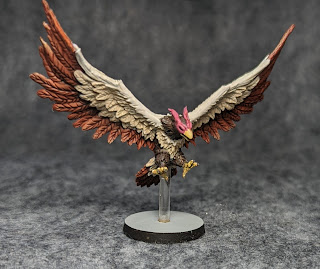
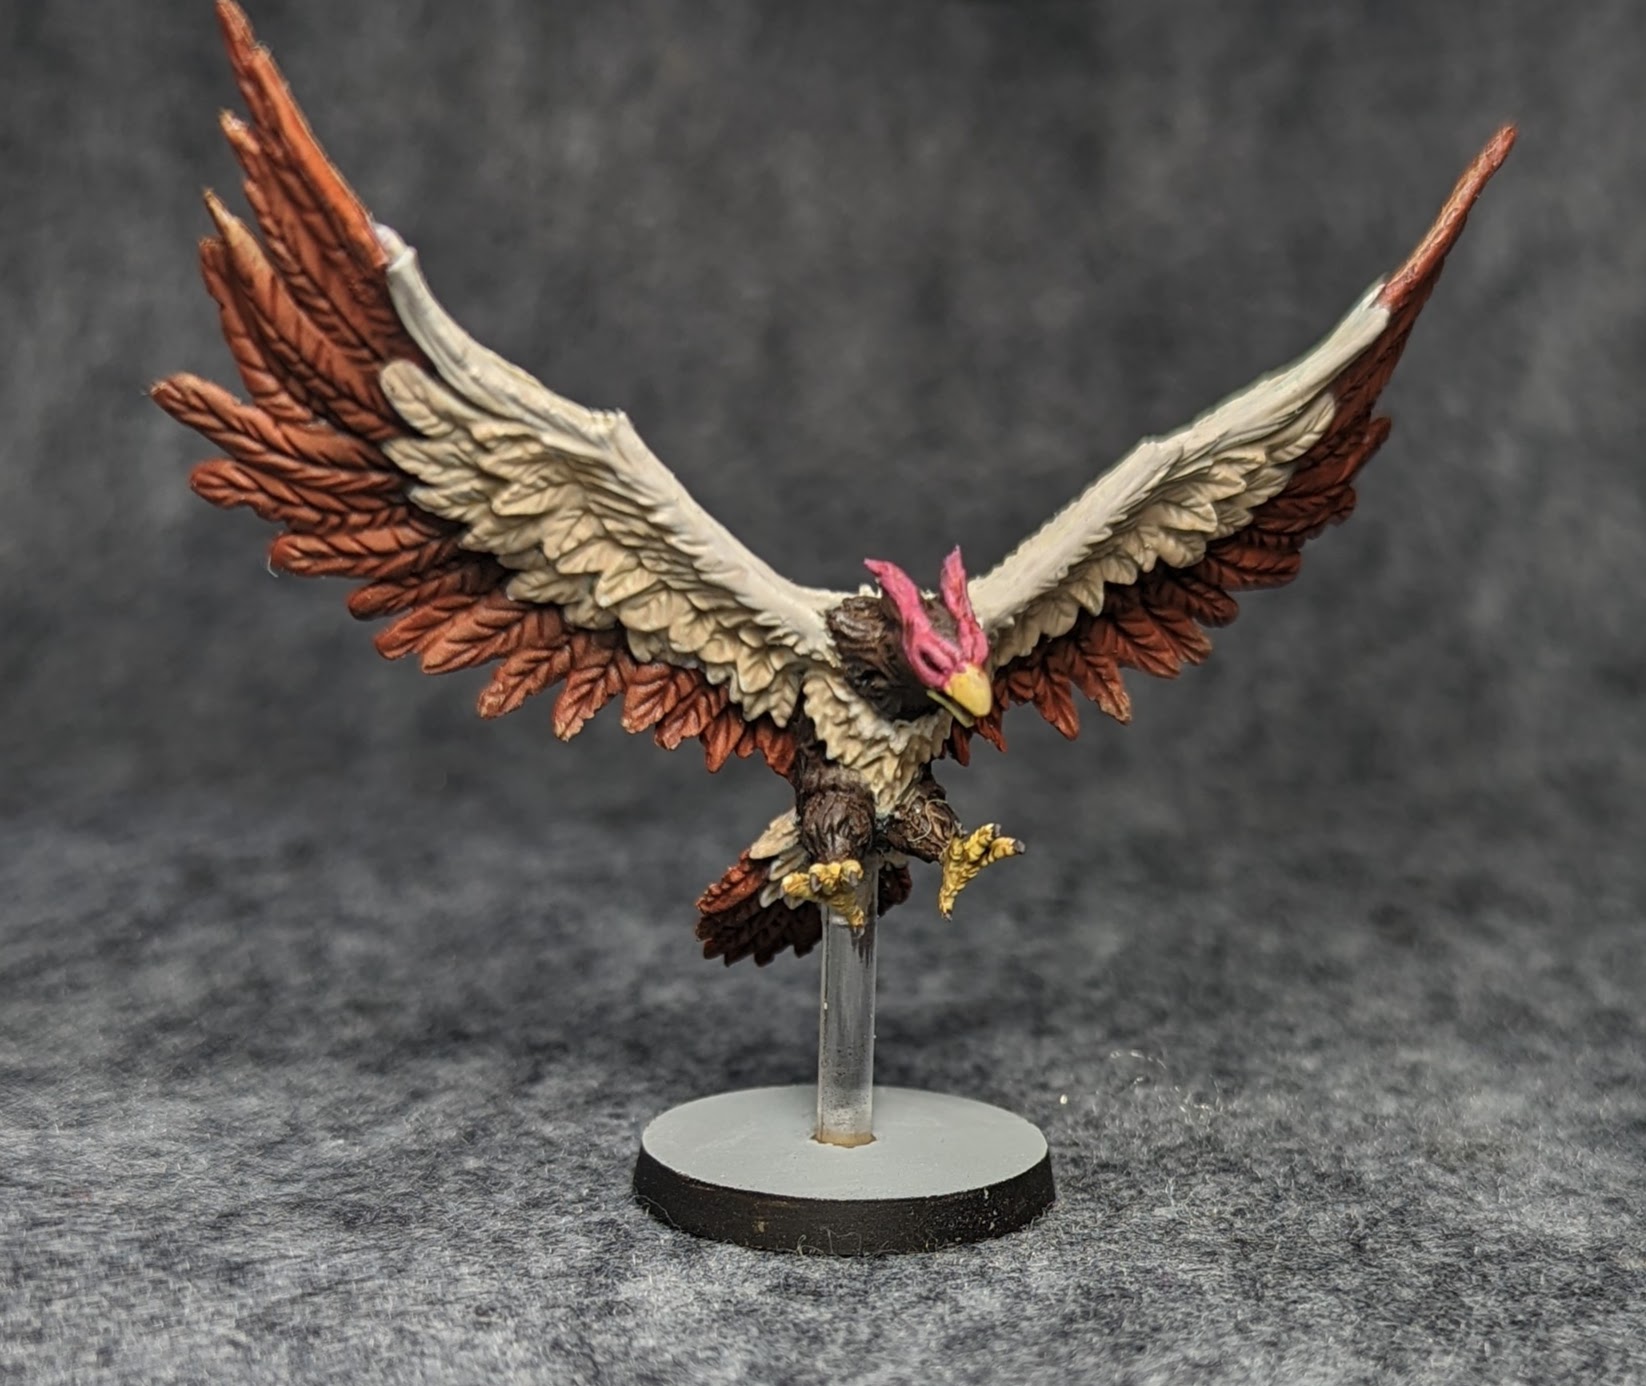
I had to start the eagle twice. The first time through, I just didn't have the right hues and contrast, and a drybrushing left it looking pretty bad. The second time through, I laid down a bit more highlights and shadows in the lighter feathers and then used a few applications of thin washes to get shadows. A few highlights were then painted in. I am sure someone could really take this model to town if they wanted to make it a show piece, but I was happy just getting it looking good on the table.
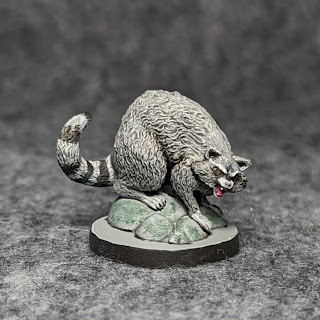 |
| Raccoon (front) |
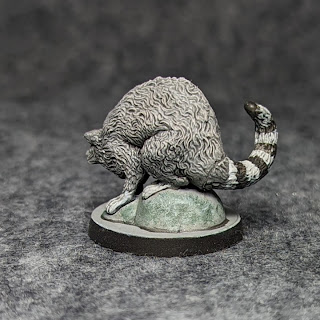 |
| Raccoon (back) |
The raccoon was an easy and fun paint job. Once again, the great texture on the model meant I could be pretty loose with the first layer and then rely on a wash to do the work.
I realized after photographing the models separately that they are vastly different sizes, but that can be hard to tell from the close-ups. Here's a group shot of the druids and their animal forms.
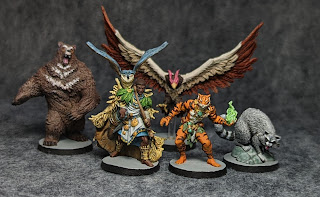 |
| Druids and Animal Forms |
Next up are the Tinkerers.
 |
| Kaylee (front) |
 |
| Kaylee (back) |
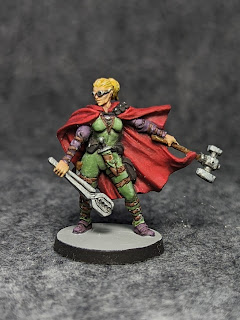
Kaylee was a pretty straightforward blonde female in a green jumpsuit with a red cloak. Honestly, I don't really like engineers in my fantasy: that feels to me less like chocolate and peanut butter and more like yogurt and pork chops. Still, the tinkerer abilities sound like fun to play. Massive Darkness was created as an excuse to chuck dice, not to compete with Tolkien, so I think it will be fine.
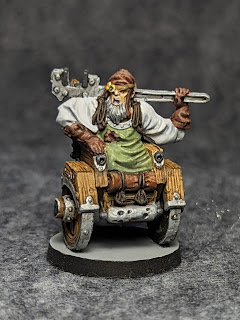 |
| Jebediah (front) |
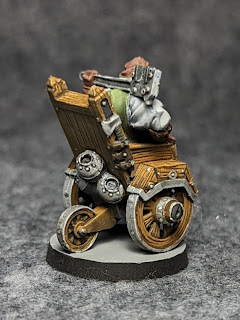 |
| Jebediah (rear) |
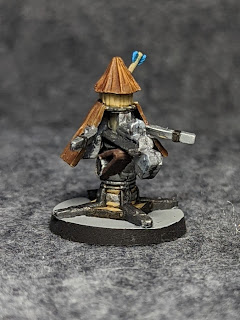
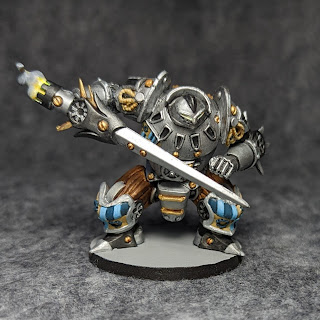
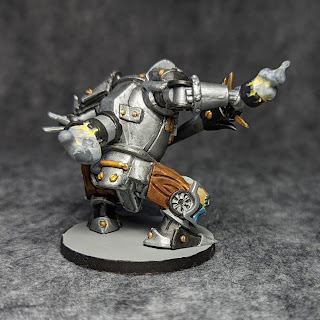
Jebediah was kind of fun to paint due to the mix of textures: not only does he have the standard skin and cloth on expects of a hero, but also wood and multiple kinds of metal. I think he turned out pretty good. I do think it's a bit goofy, though. Somehow, his rocket chair gives him extra movement points. I've only been in a few ruins, and I've never been in a dungeon Hellscape, but the ones I've seen are not very accessible. I found myself wondering how he would pick up a treasure off the floor, but I guess that's what the giant wrench is for.
Just for fun, I'll tell you what I came up with when I asked myself, "How would I include an amputee in Massive Darkness?" My mind does not go to rocket technology and giant wrenches but rather to magic. The wheelchair is a means to an end, allowing him to move around, while also being the product of his hard work. Imagine now Jebediah as a sorcerer, levitating on a scintillating ball of magic, reaching out tendrils of otherworldly power to bash enemies and to smash open doors. He could move around the Dungeon Hellscape and impress his allies with his sorcery. I think it would make a great model to paint as well!
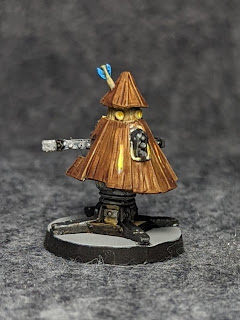
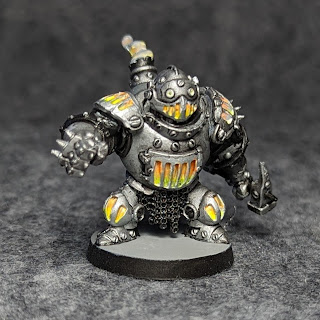
The four extra Tinkerer models were batch-painted since they used all the same colors. I started by overbrushing each one with Vallejo Model Air Steel, and I made heavy use of my P3 Armor Wash. The darker metals are Vallejo Model Air Gunmetal mixed with black. Several of them have an "inner fire" effect on the card art. I put down multiple layers of Vallejo Foundation White to get a solid background, and then I layered in VMC Yellow Fluorescent and Vallejo Mecha Color Orange Fluorescent on top of that. This and the smoke effects were inspired by Sorastro's Marvel: Crisis Protocol series, particularly the Deadpool episode. I had tried these fluorescent paints a while ago on other models and was very unhappy with them, but this time, I think they filled the bill; I am not sure what the difference was.
Like the eagle above, many of these could be real showstoppers if someone wanted to come in and do some non-metallic metals or reflective hues.
 |
| Guard (front) |
 |
| Guard (back) |
 |
| Sentry (front) |
 |
| Sentry (back) |
 |
| Guard (front) |
 |
| Guard (back) |
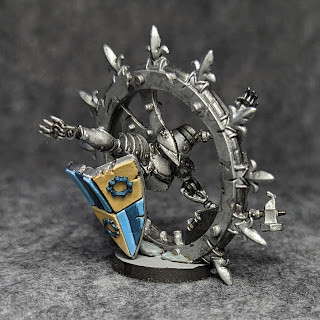
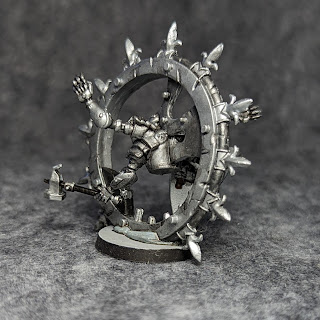
 |
| Exo-Armor (front) |
 |
| Exo-Armor (back) |
Here they are all together, in part to show the scale.
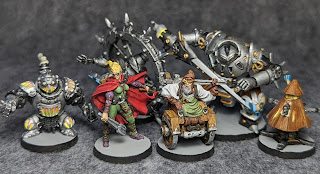 |
| Tinkerers, Constructs, and Exo-Armor |
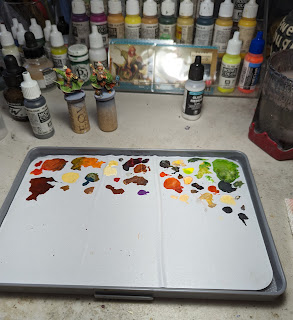
As I was wrapping up the constructs and exo-armor, my Red Grass Games Wet Palette arrived. I backed the Kickstarter after hearing positive things about wet palettes over the years. One of the things that turned me off from them was that they seemed wasteful, but I liked that Red Grass promised a reusable membrane. Given that the two bards have almost identical color schemes, I figured this would be a good opportunity to try it out.
I painted the bards in about four sessions across three days. After my first session, I was kind of unhappy with the palette. I had a hard time getting the right consistency from my paints: too thick is never good, but adding water made it run across the palette. I also wasn't sure how much paint to use, since my usual method of eyeballing is (perhaps more than I realized) bound up in the simple white plastic palette I use. When I decided to add a little glaze medium, my green got super runny on the palette, while the edges of it seemed completely dried out. I wondered if I didn't have enough water in the wet palette, so I added some more and put the lid on. A day later, I sat to continue the project and was amazed to find the paints still usable. Yes, some of the green had dried at the edges, but everything else was basically fresh. Some of the paints separated slightly and needed to be mixed again, but I have to say, the Red Grass palette did exactly what it said it would do.
 |
| Wet Palette after having finished the bards |
I think I need to look more at the technique of using the wet palette. I have a pretty good system for getting decent transitions using two-brush blending, a well palette, and glaze medium. Two-brush blending in particular seemed redundant with the wet palette, but I kept using it because it is my standard approach. The few times I have watched painters use wet palettes, they seem to spread out the blends across more physical space. I was hesitant to do this because I had very little sense of how much surface area I would need for these figures. My conclusion is that I am interested in using the wet palette again, but I think I need to have a good purpose for it: either something with complicated transitions or a time when I know I need to keep a color for more than one session.
Incidentally, I rinsed off the membrane, and while it's slightly discolored, it is still clearly reusable. There is some dried green in the corner that did not come off, but that is exactly as per the instructions: if you let the paint cure, don't expect it to be removable.
Enough exposition about technology. On to the musicians!
 |
| Dylan (front) |
 |
| Dylan (back) |
Here's Dylan, who, with a name like that, I expected to be a short, wiry, melancholic sort. It was a fun model to paint, with bright colors and interesting details. I like that he's a big guy standing on a cask: the whole model shouts personality. One of the challenges I faced is that he has his eyes closed, and I did not expect that to be such a challenge to paint. There's lots of advice for painting eyes; there's less about painting eyelids. I could have painted his eyes open of course, but I think the closed eyes, lost in the song, is a big part of the charm of this figure.
 |
| Thalia (front) |
 |
| Thalia (back) |
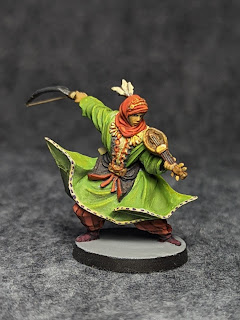
When I took Thalia out of the packing, I thought that his sword was bent. Then I wondered if perhaps he was wielding some kind of khopesh or curved sword. It wasn't until I looked at the card art that I realized that, of course, it is a bow for his violin-like instrument. This was hard to tell because only the stick is sculpted, not the hair. I got some beading wire, trimmed it to size, and super-glued it in place. This made all the difference in the world in terms of "reading" the figure. Like Dylan, I also think this is a great model: the posture implies a real dynamic motion in a way that makes poor Kaylee above look really bland.
Thalia's card art has even more wonderful details that I chose not to paint simply so I could wrap up the bards and move on to other things. I don't imagine I'll ever come back to it, though it's tempting. That's a case where the wet palette could be useful, too: keeping the green around long enough to cover up the inevitable mistakes that come from freehanding designs over billowing fabric.
That's all for this installment of Painting Massive Darkness 2. I hope you'll come back next time for more.


